GPS project: portable power percentages

My next task was to get the partially functioning battery monitoring code worked out. I made several different attempts to work out something that I was happy with, before finally settling on the current solution, which may get changed yet again!

Basically the monitor pin on the Lithium Backpack outputs the current voltage of the battery. Knowing that this is approximately 2 – 4.5v I decided to try to use the full range of the analog pin, but build a voltage divider to get a 4.5v reference voltage. I’m not an electronics guy, although I’m learning fast, so sometimes I still get excited about the little victories. Needless to say I was excited about getting a little circuit made out of resistors working! A little math in the code, and I had a somewhat accurate display of the percentage of battery remaining. Well kind of, that is until the voltage dropped. With the bottom end of the voltage range being ~2v instead of 0, the percentage was only partially accurate through the top half of the range.

I decided to use raw numbers instead, and map them to known high and low values. I set up a test sketch to send the analog output to the Bluetooth (so I could stay on battery power, and not plug into the USB), and built a quick and dirty .NET app that would log the data to a text file. I then left the unit running overnight and logged the values from fully charged to shutdown. I ran it again the next day while I was working, and took the lowest / highest values from those two runs as my base points for mapping the % of battery remaining.

I should point out that I’m pretty sure that this is not a 100% accurate method. I bet that if I charted the results I would see that the voltage drop is not constant over the life of the charge. Implementing my current solution only requires a call to map(), where implementing a more accurate solution would require a lookup table with time and voltage parameters, or some math that I’m really not in the mood to deal with at this point!. At the end of the project, if there is memory left on the Arduino, I will come back to this particular feature and investigate a more thorough solution.

I also added a routine to average the percentage; the output of voltage jumps around quite a bit, and once it is mapped and converted to a percentage it tends to constantly hover in a +-3% area. By averaging the last 10 reads I was able to slow the “flutter” down a bit. I may increase the sample rate on this as I refine the code.

0 Comments

GPS project: batteries and buttons

100_1556

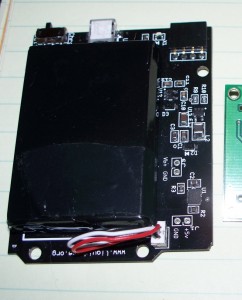
The Lithium Backpack from Liquidware is a pretty straight forward affair. It has outputs for +3.3, +5, and ground, along with a status pin. I added three more wires to the “shield” that I created for the LCD. This brought the +5 and ground pins from the backpack, to the corresponding pins on the Arduino, and connected the status pin to an analog pin. At this point I could add the % of battery left to the LCD, but left the work of getting accurate data for later on, and just used the analog value, since I had some data flowing, and wanted to work on the menu system.

The only issue with the backpack (that probably only pertains to the extended model with its’ tall battery) is that the pins on the reset button were pressing against the top of the battery, and tore into its’ protective cover within a couple of days. A third standoff in the kit would solve the problem. I submitted this suggestion on the liquidware site, and got a prompt response, so here’s hoping that they’ll add another one for future orders.

On to buttons:

I wired up two buttons on the breadboard, and stole two pins from the GPS Logger shield (since I had the LCD menu, I had removed the code that used LEDs to display fix and SD card write status, so these pins were free).

I worked through a couple of different libraries, and samples for switch code, before deciding to use Jeff Saltzman’s press and hold sample code.

In order to conserve battery life, I implemented a routine to turn the backlight on the LCD off after 30 seconds. On the first button press (either button) the app checks for the backlight, if not on, then it turns it on and ignores the rest of the button check routine.

The menu system is based on two buttons controlling 4 menus.A single press of button 1 engages a “tagging” menu. Once this menu is engaged, button two is used to scroll down through the list of options (in a loop). Pressing button 1 again writes the selected tag (waypoint) to the file on the SD card. Pressing and holding button one brings up a “mode” selection menu. Again button two is used to cycle through the menu options, and pressing button one again exits the menu, applying the selected mode. Modes will be used to turn features on and off to save power when not using a feature. Button two is used to toggle between longitude / latitude display, and advanced information display screens. The press and hold on button two will have an additional menu added to it, but I’m not sure what at this point.

Next I’ll outline extending the output from the GPS (and parsing / displaying the data), and getting the battery monitor code cleaned up.

0 Comments